1. 🏄🏼 Getting Started
Great news! You’ve decided to create your first Manuscript. 🎉To make it easier for developers to get started with Manuscript, we’ve introduced a GUI tool.
Built on top of the existing CLI, this tool provides intuitive graphical interfaces to explore the extensive blockchain data available on the Chainbase network.
After installing the GUI tool, you can run the binary file locally straight away.
2. 🚴🏼♂️ Selecting Data
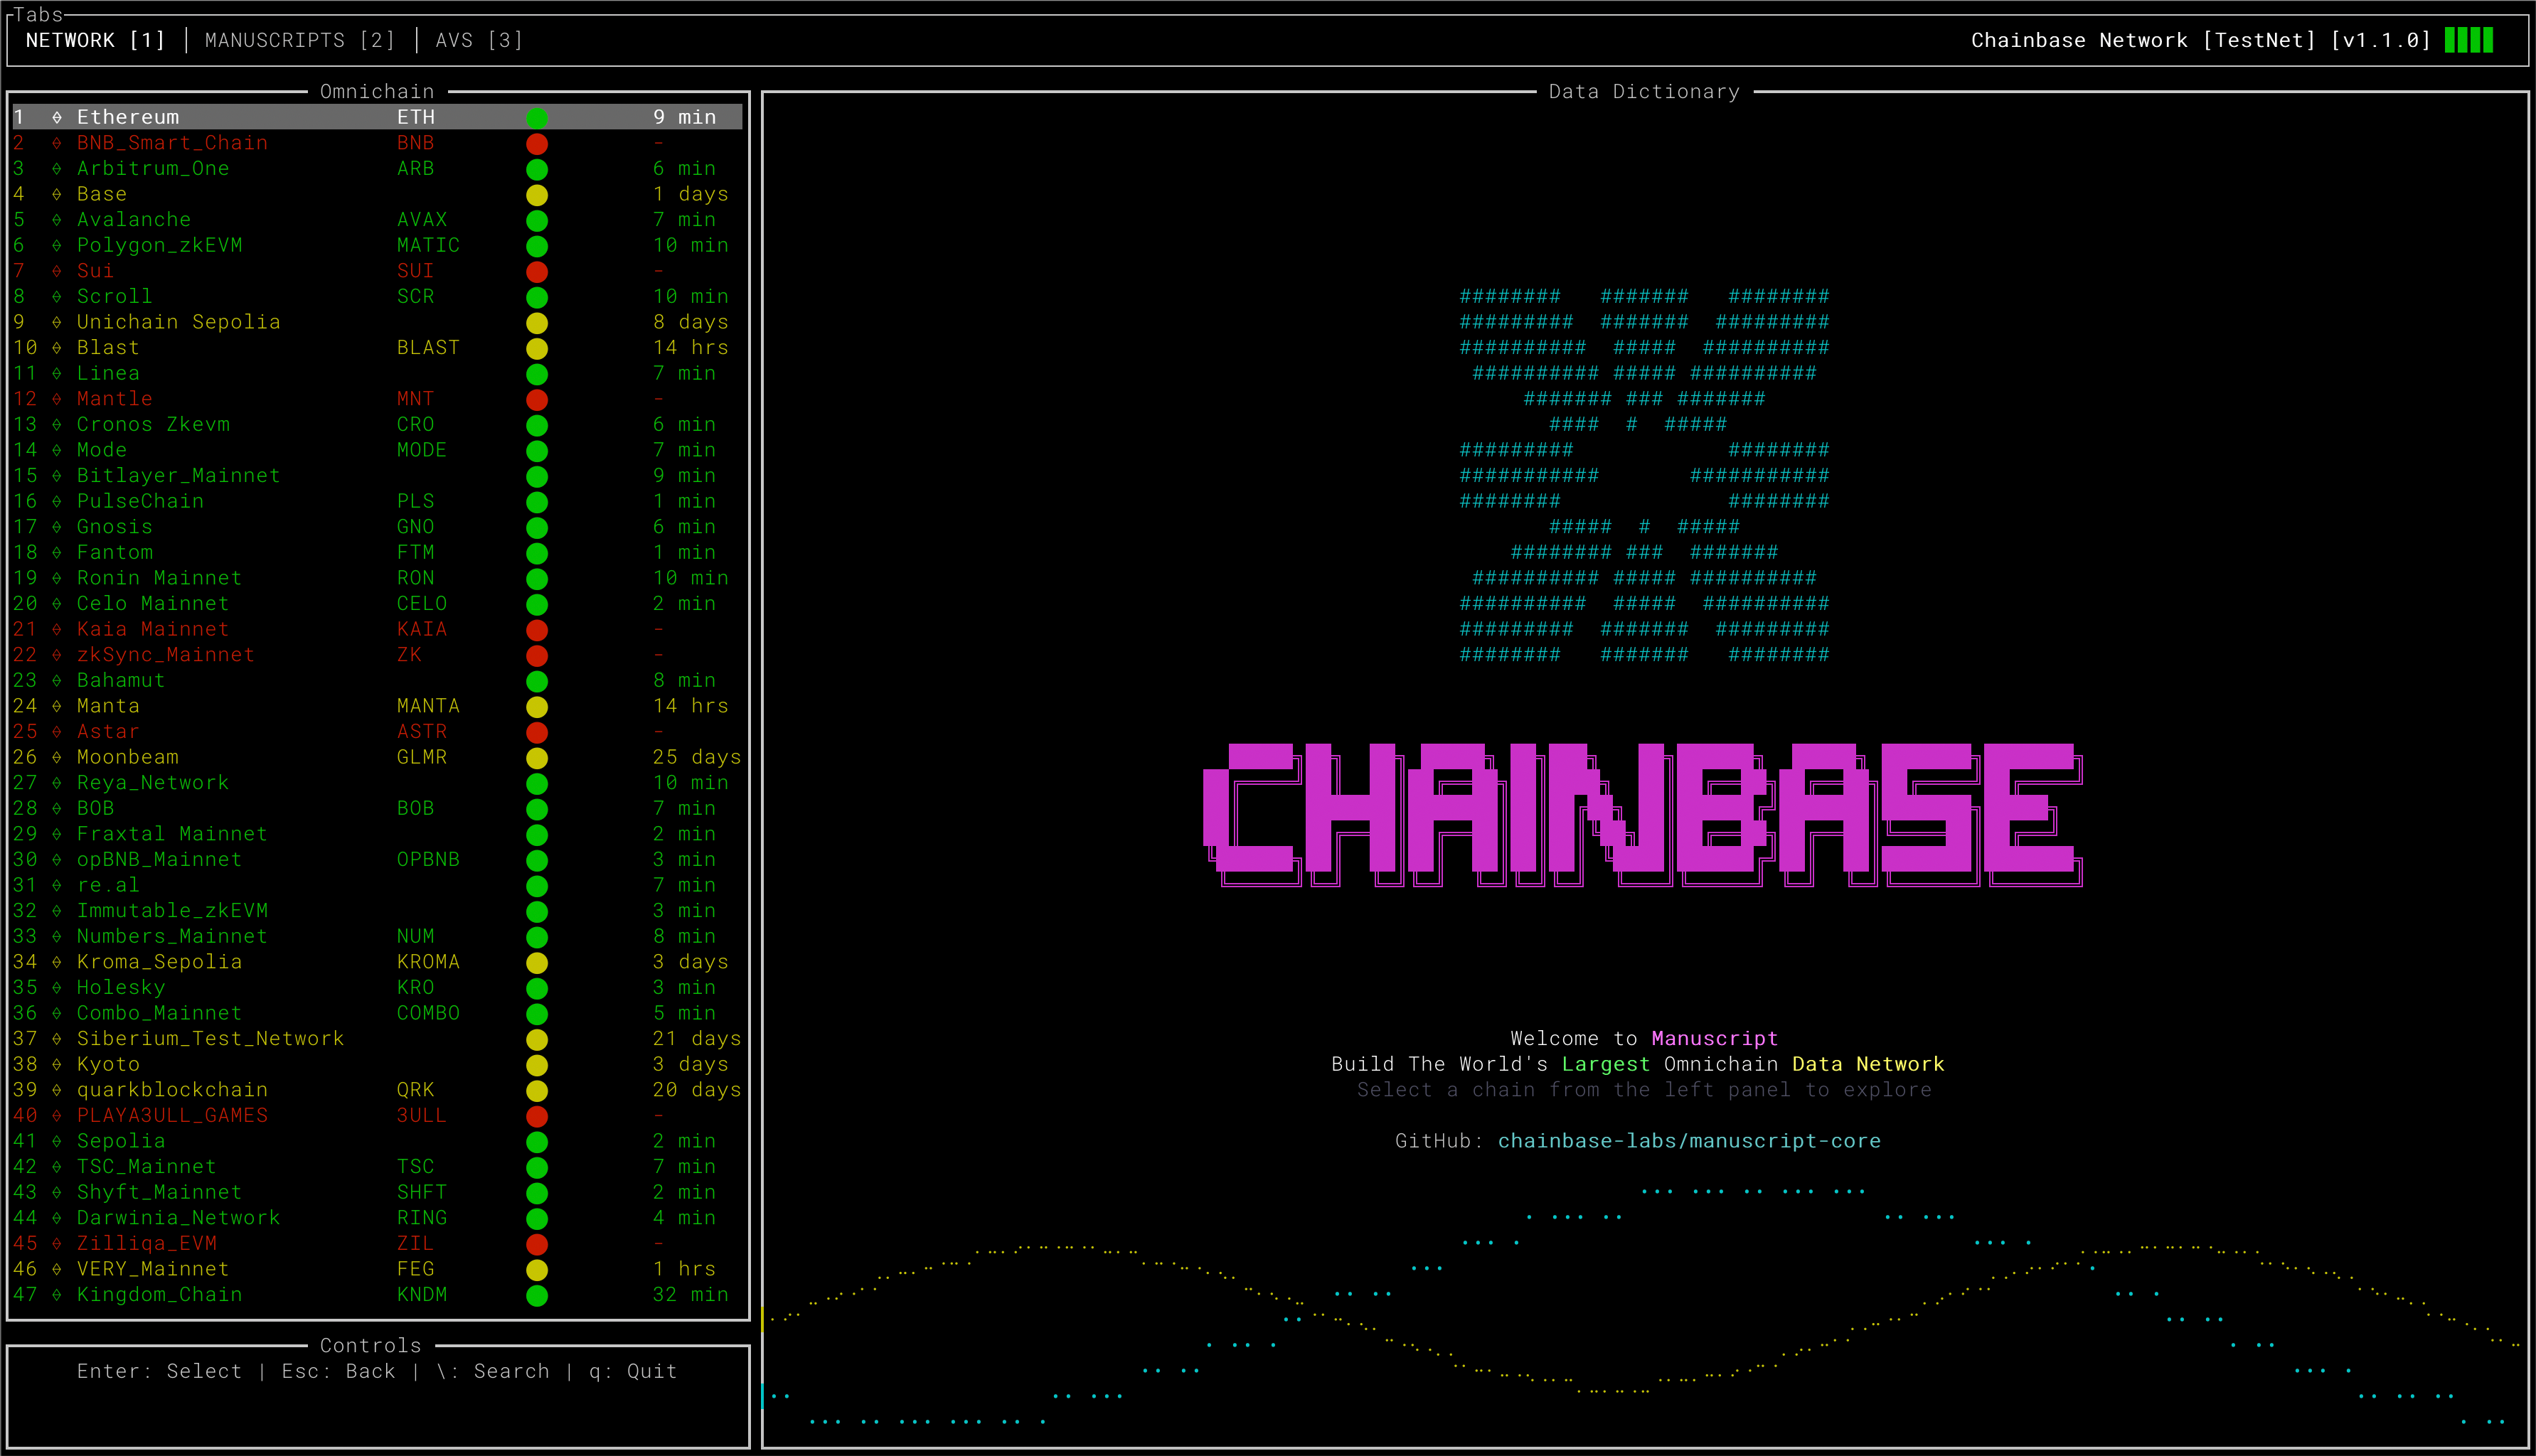
Once the tool has loaded, you’ll be greeted with the GUI interface shown below.The left-hand panel allows you to select your desired blockchain.
3. 🤽🏼 Choosing Table
A dataset refers to either a raw data table or an abstract table.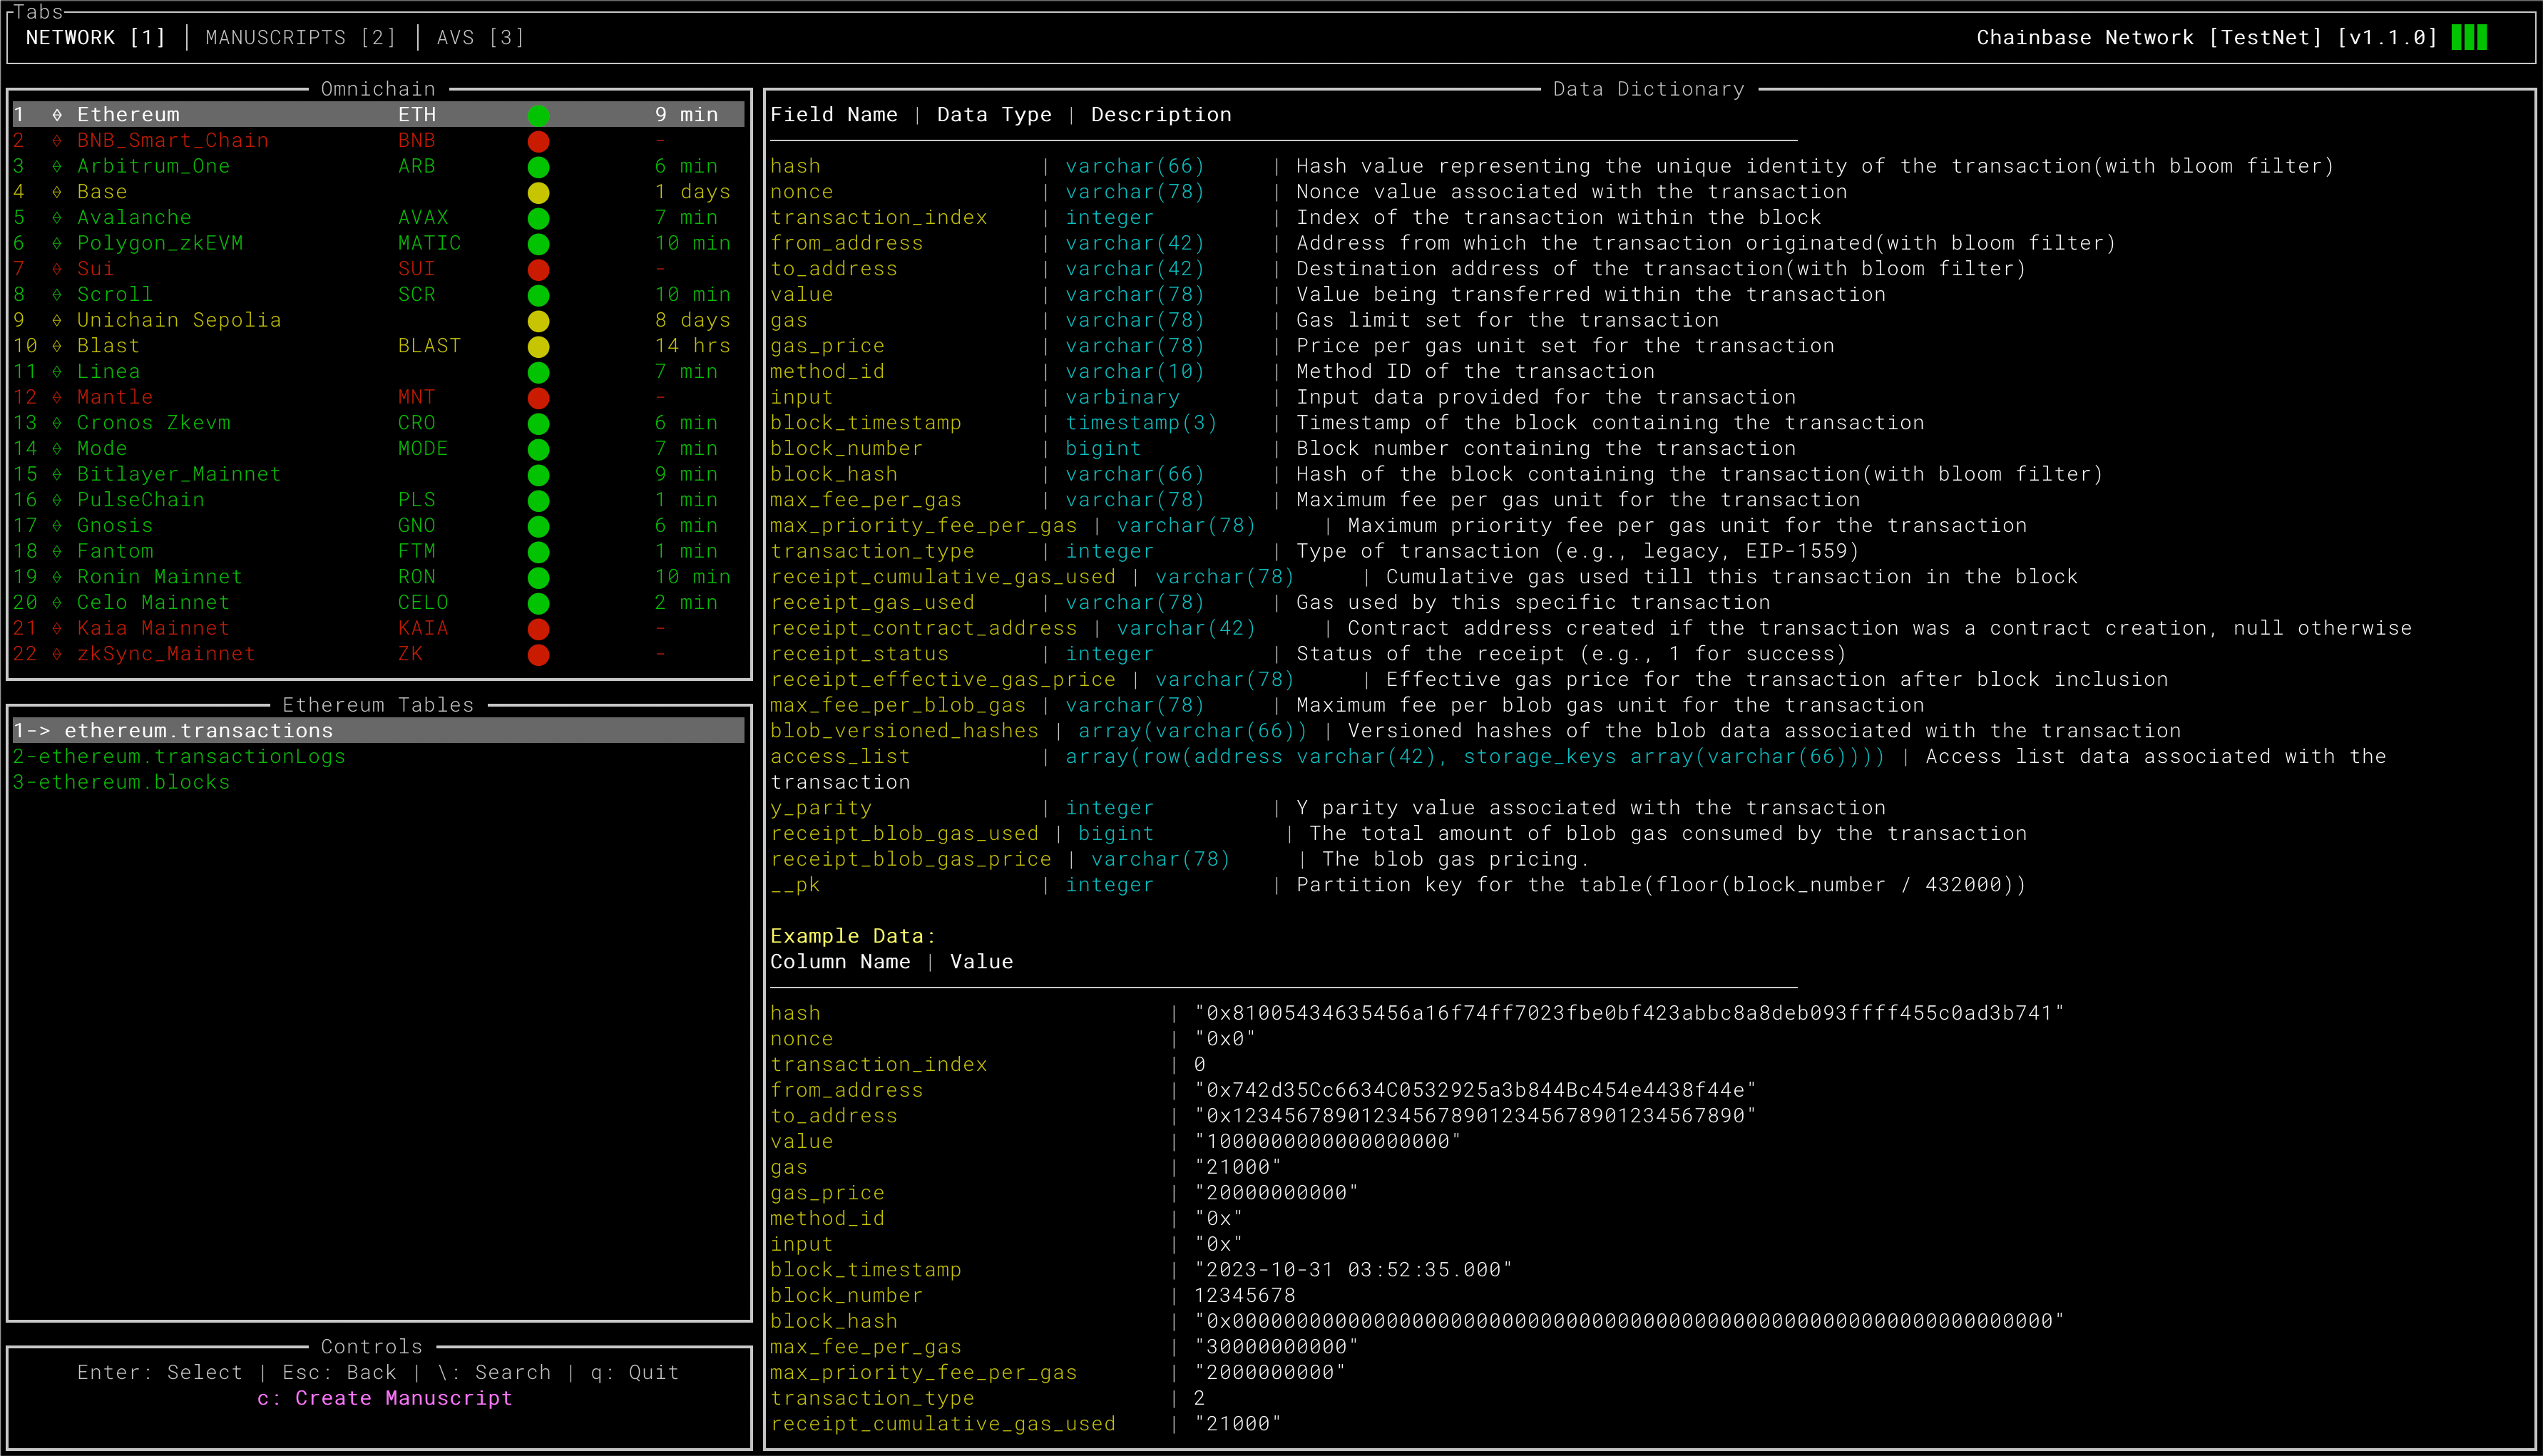
4. 🏊🏼♂️ Creating a Manuscript
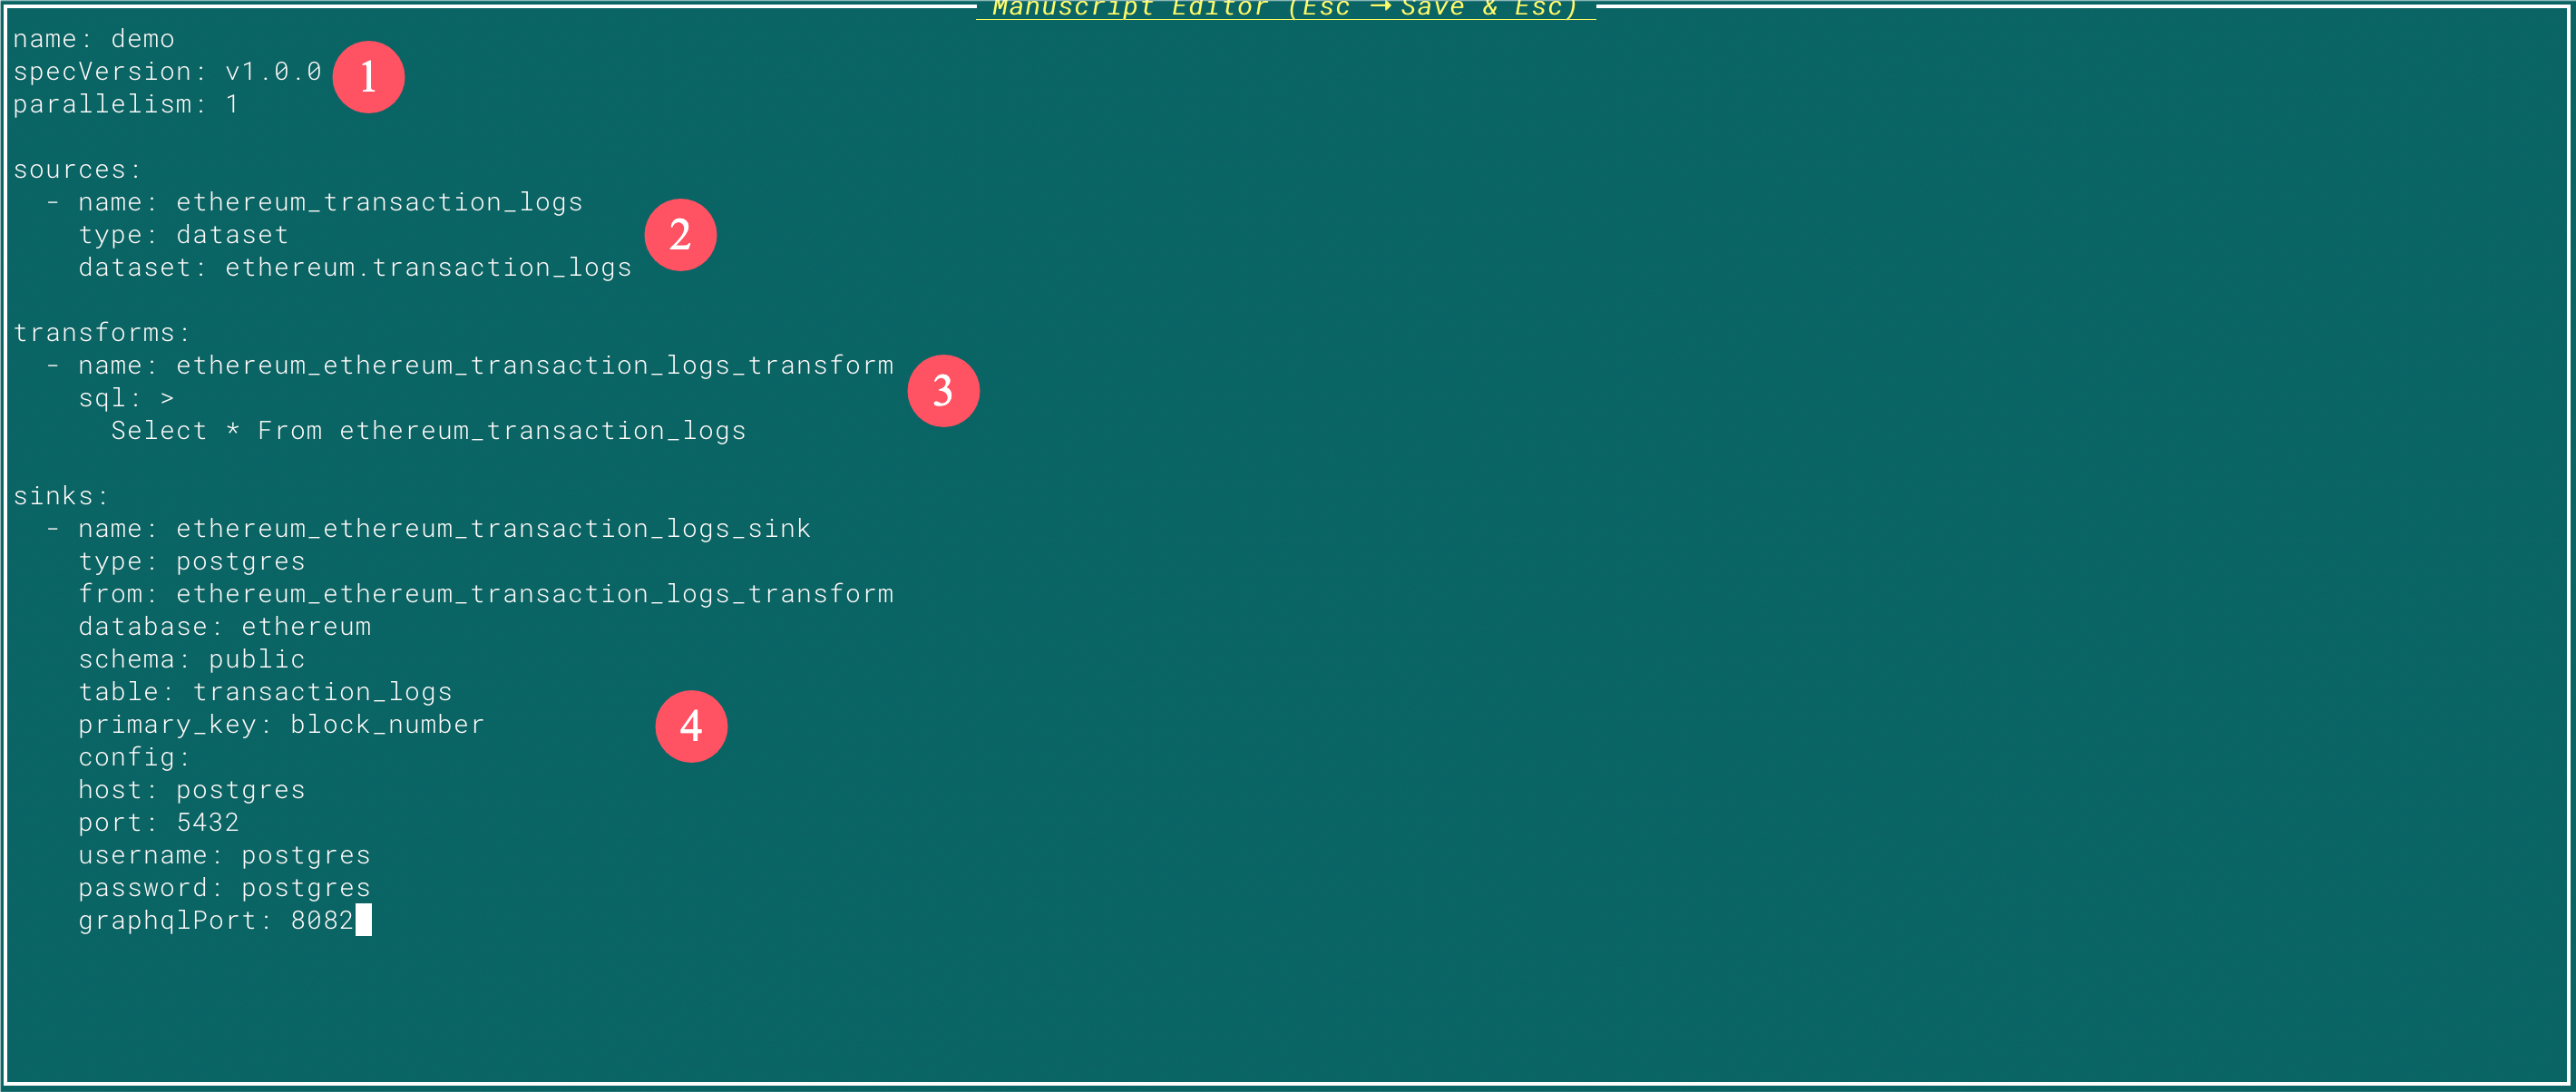
You can use thec shortcut key to create your Manuscript YAML file.
-
Data Sources
Here, you’ll define your data source, which can include various options. In this demonstration, we’ve used the DA layer from Chainbase, though custom RPC endpoints and other sources are equally supported. -
Data Transformation
For data transformations, this demonstration uses SQL queries, a familiar and widely-used method. The tool is compatible with standard SQL syntax as well as popular Flink SQL functions. -
Data Slink
In this example, the data is exported to a local PostgreSQL database, complete with support for GraphQL queries.
5. 🚣🏼♂️ Debugging and Deployment
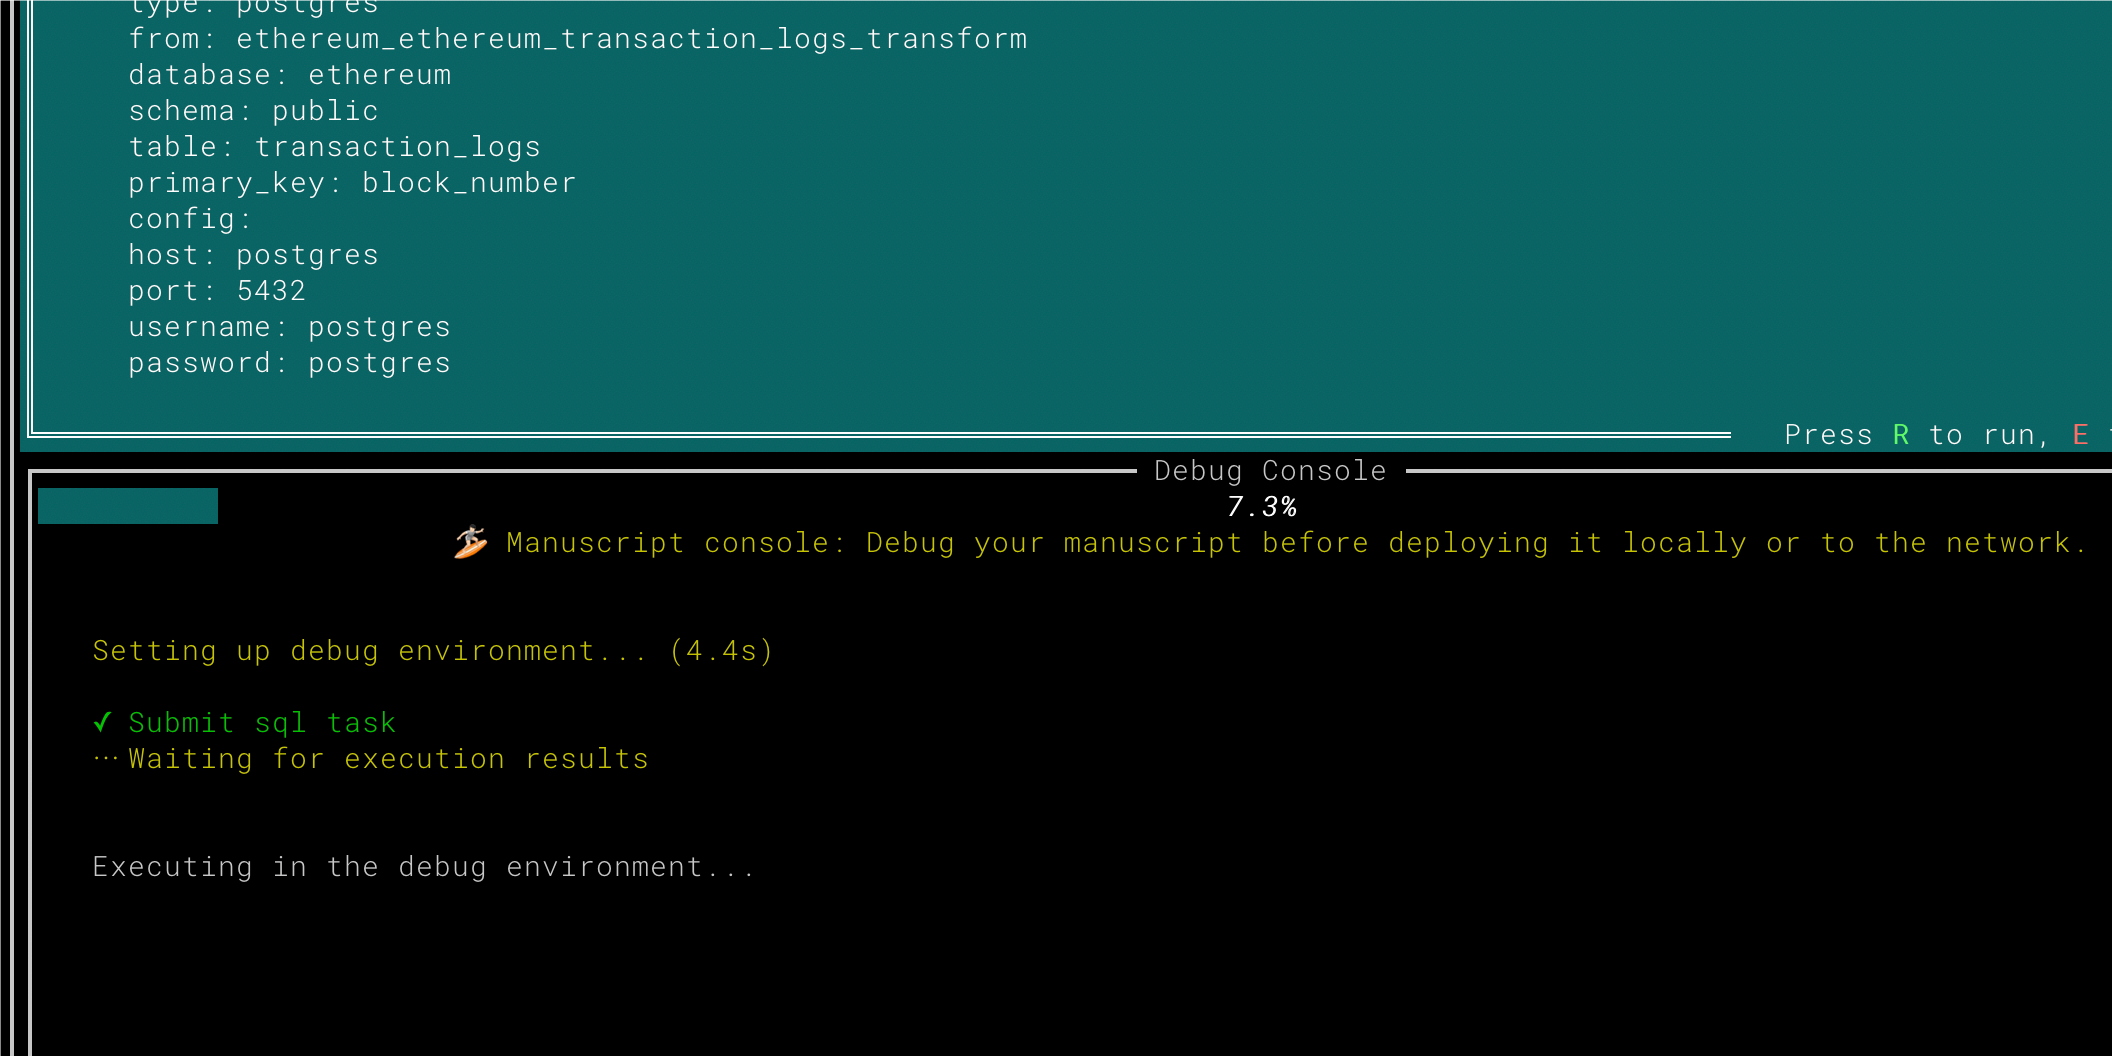
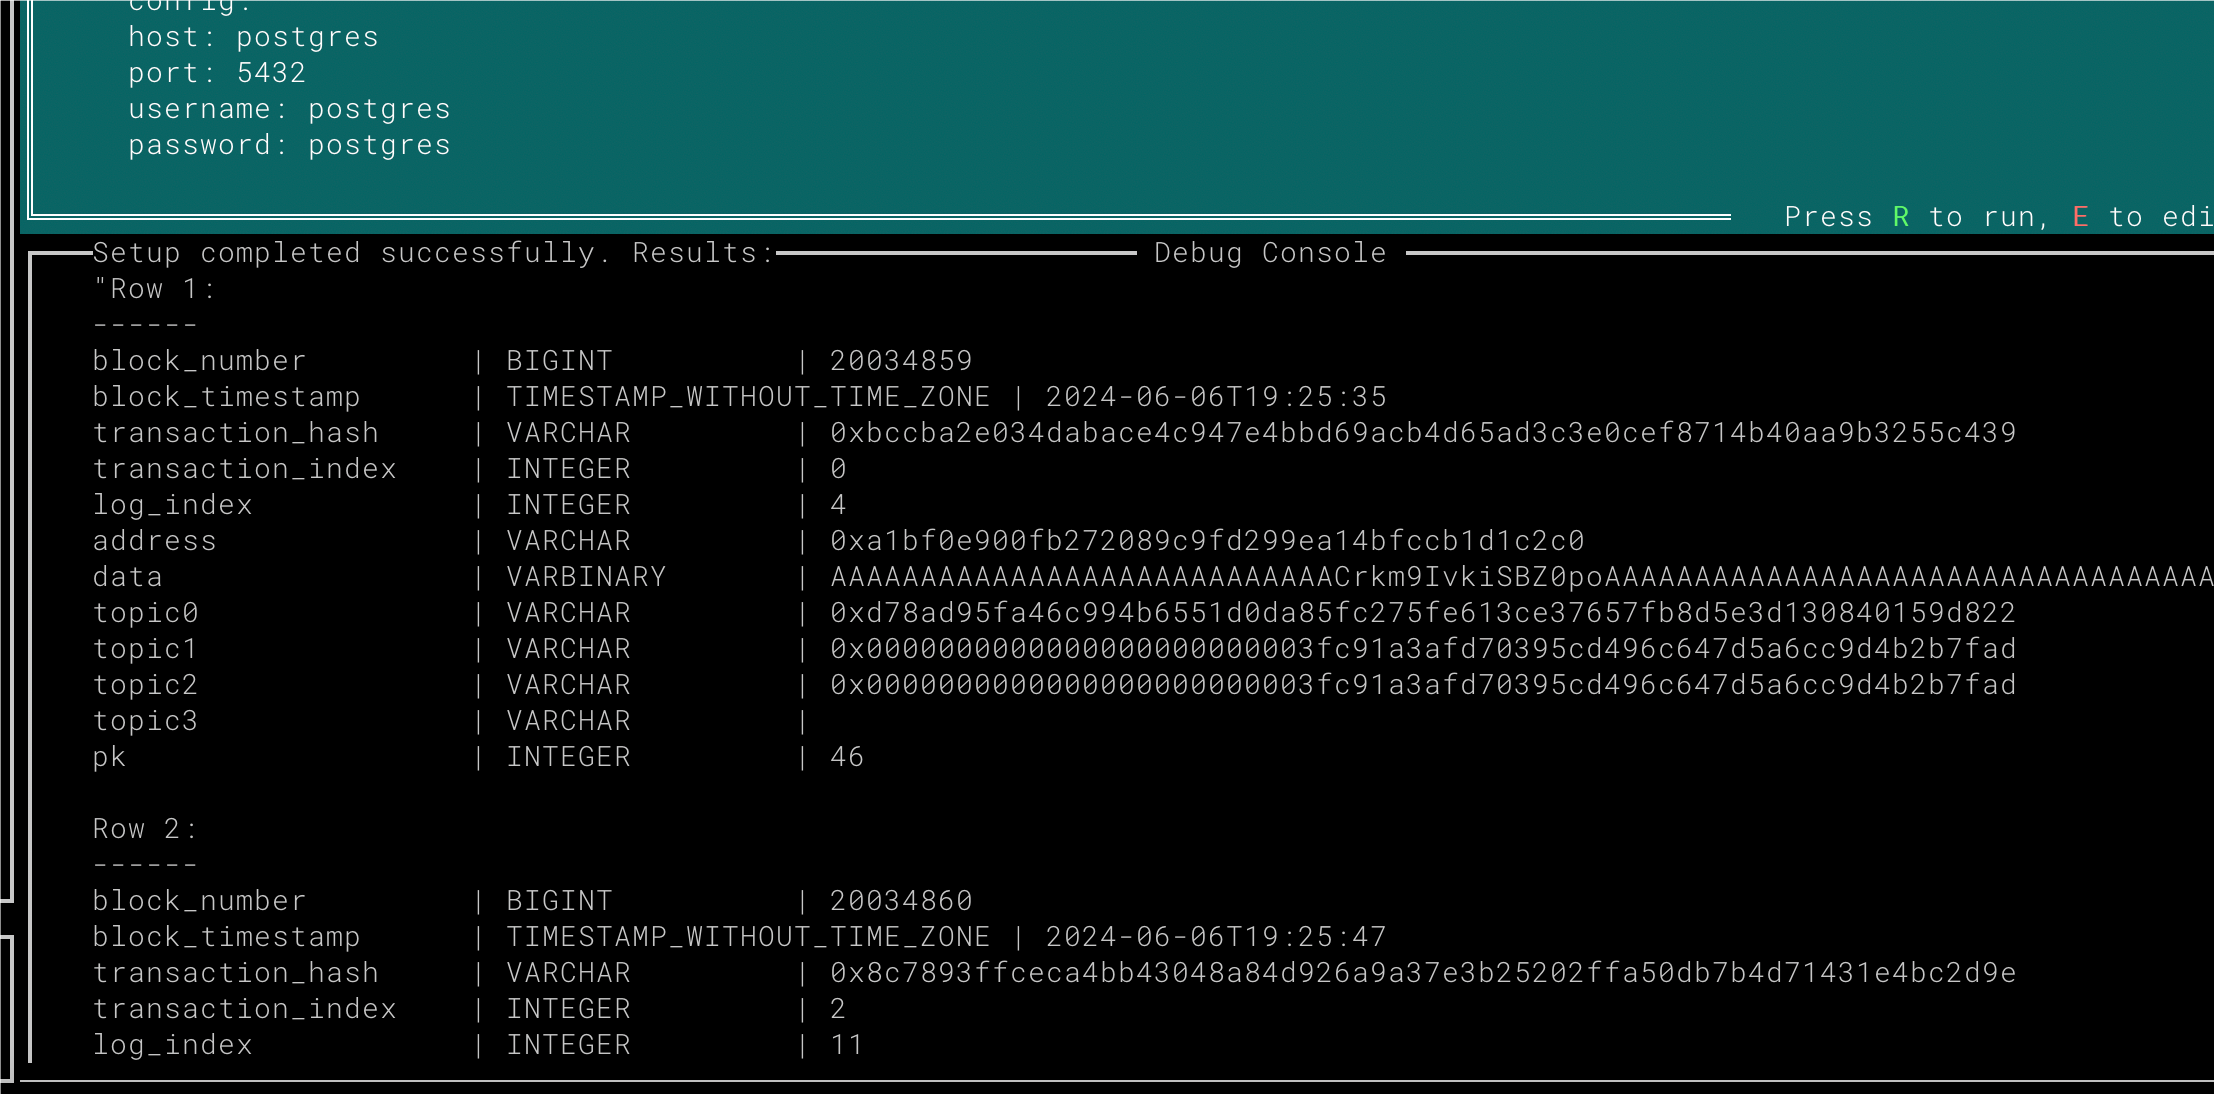
After confirming the results, you’ll be able to deploy the Manuscript locally or to the Chainbase network. Congratulations! You’ve successfully created your first Manuscript. 🚀🚀